If you have an XDR-branded iPad (such as the M4 iPad Pro), you may use it as an HDR monitor for your Mac. And you can do this even if you do not have any other HDR display. So this may be a nice option for either adding an extra HDR display, or for getting started with HDR using a display you already own (using your big screen TV over HDMI is yet another option).
How to set up your iPad as an HDR monitor for your Mac:
On the iPad: go to Settings / Display & Brightness / Advanced and enable “reference mode”.
- This is like using the HDR Video preset for XDR on your computer (ie limits peak HDR to 1000 nits), it will also disable options like true tone and night shift (as those make color less accurate).
- In this reference mode, the iPad will offer 3.3 stops of headroom (fixed 100 nits SDR and peak 1000 nits HDR – not the full 1600 nits peak, as that is not the maximum sustained brightness and therefore not suitable for reference viewing).

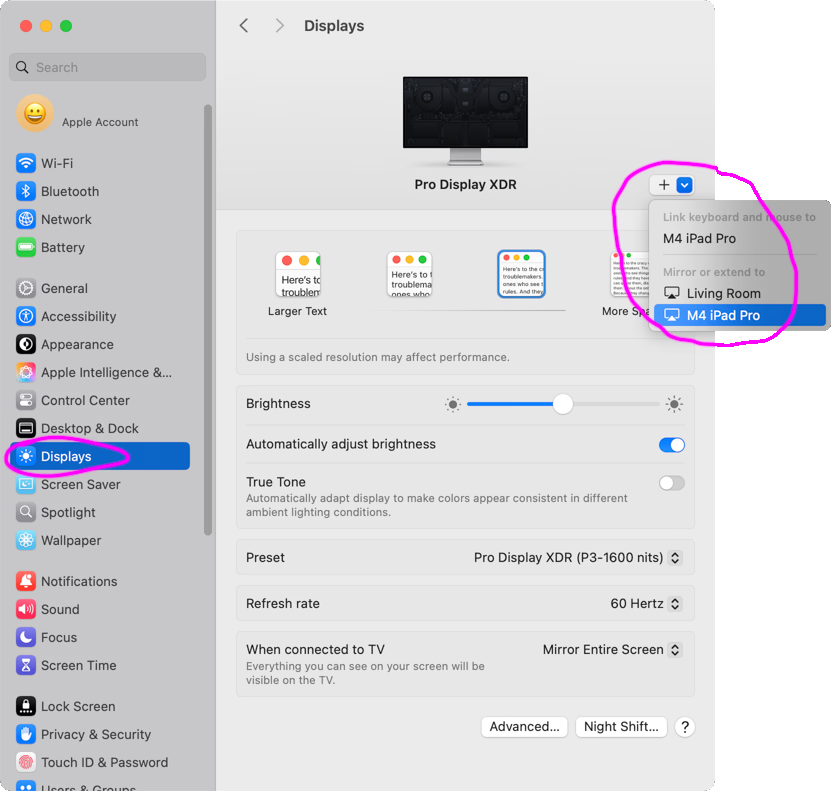
In MacOS: go to Settings / Display:
- click the “+” dropdown near the top-right and choose to mirror or extend to your iPad.
- If you are mirroring, you can click stop mirroring to switch to an extended display. Or if you are extended, you may click the “use as” dropdown and choose the option to start mirroring.
- If you wish to use the iPad as the primary HDR display (which is ideal if your monitor is SDR or limited HDR) and are mirroring, be sure to select the monitor and set the “optimize for” to the iPad. Note that you won’t have any options for the display resolution and are likely to see black bars on the left and right of your monitor (given the aspect ratio of an iPad).
- Note that when connected, the MacOS view on the iPad is shown via the “continuity” app. You may switch to another app on the iPad and then back as desired.

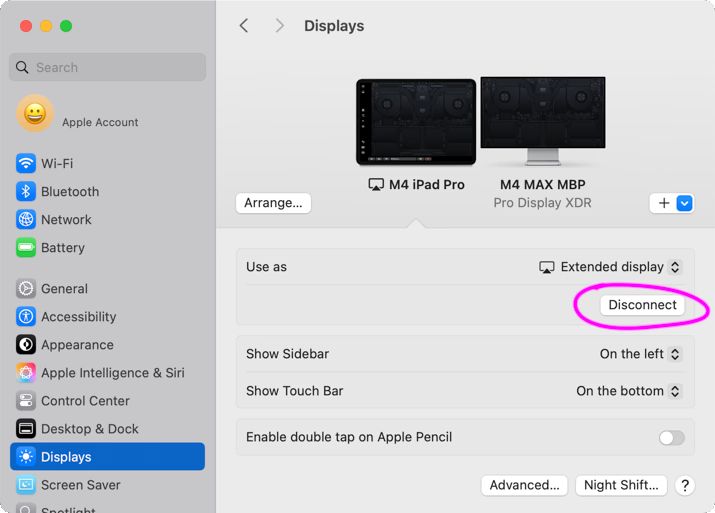
If you wish to disconnect, you may click on the iPad icon and then click “disconnect“.
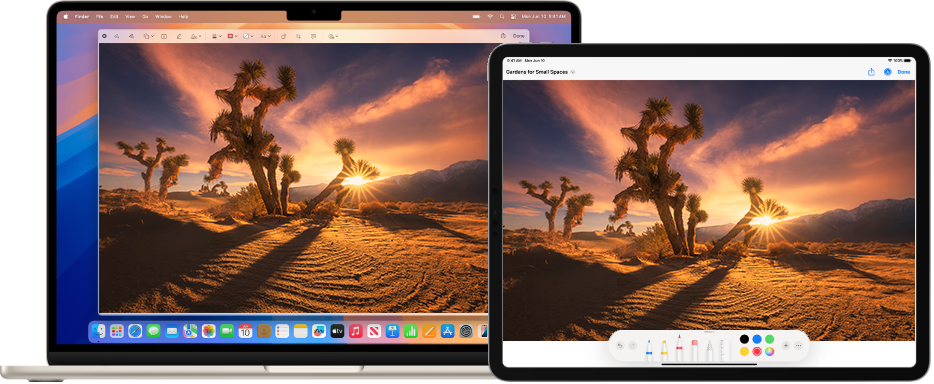
One potential use case for a secondary monitor is to show an image you’re editing on the main window and a reference photo on the other. For example, you may wish to show your HDR as a reference on the iPad while editing an SDR virtual copy on your laptop display.
To edit with a reference photo in Lightroom Classic:
- Connect the iPad as an extended display.
- In LRC, go to the develop module and click the “2” icon on the far left just above the film strip. This will show another window on the other display. You may <option>-click 2 to show it as full screen.
- In the secondary window, click on “loupe” at the top (which may be hidden depending on prior use).
- In the Develop module, view the image you wish to see in the secondary window and then click <cmd>-<option>-<return> to lock that image in the secondary display (you may also use the mouse to click “normal” vs “locked” at top-right of the secondary display, it’s just a bit more work if you don’t recall the keyboard shortcut).
- Now select the image you wish to edit in the Develop module (the other window won’t change as it is “locked”).

