There are still some holiday deals on some great HDR displays:
- HIGHLY RECOMMENDED: $140 off the ASUS PA32UCXR monitor. See my full review.
- $200 off ASUS ProArt PA32UCDM 1000-nits QD OLED. See details below.
- $300 off ASUS PG32UCDM ROG Swift 32” 4K OLED Gaming Monitor (VESA DisplayHDR 400 True Black). See details below.
- $100 off the M5 iPad Pro. This is the best HDR computing display I have ever seen, truly outstanding for content consumption, Lightroom, or even as a HDR display (see how to use your iPad as an HDR monitor.)
HDR offers vastly improved image quality through brighter displays with massively expanded dynamic range. To use it, you’ll need to use an HDR-compatible monitor and I’ve created this page to help answer a lot of questions about which options to consider. We’ll look at general considerations and then options several categories including:
- External monitors (for Apple or Windows)
- Apple laptops
- Windows laptops
- calibration / profiling for HDR
- mobile phones
- tablets.
I primarily use a 32″ Pro Display XDR (1,600 nits mini-LED), M4 MacBook Pro with 14″ Retina XDR (1,600 nits mini-LED), iPhone 16 Pro (1,600 nits OLED), and Sony A80CJ (OLED with 750 nits peak). All of these offer excellent HDR experiences (the TV only does at night or on very cloudy days with low ambient light). I’ve used these with a wide variety of content in a wide variety of lighting scenarios. I have additionally purchased several other HDR displays for testing/reviews and have some degree of hands on experience with probably hundreds more. There are a wide range of options to choose from to suit different budgets.
If you’re looking for the best options, all the following are ideal ways to get into HDR:
- Best options:
- The M1 or later 14″ or 16″ MacBook Pro (which has a 1,600 nits XDR display). The quality of these HDR laptop displays is unmatched by anything else on the market. This is an excellent way to get started with HDR if you are a laptop user. See my reviews of the M1, M2, M3, M4, and M5.
- For MacOS users who want 27″ and have the budget, the Studio Display XDR is the clear winner. It has the best image quality, the simplest setup by far (just plug it in and everything works automatically), zero fan noise, and outstanding accuracy (no need to calibrate).
- The ASUS PA32UCXR is an outstanding 1,600 nits mini-LED for both PC and MacOS users. It offers 1,600+ nits with minimal blooming for a mini-LED, excellent color accuracy, and an integrated colorimeter. Highly recommended.
- The ASUS PA32UCDM is an outstanding 1,000 nits QD-OLED and supports calibration (colorimeter not included). This is a great option for those working in an environment with controlled lighting (ie if you can set SDR brightness around 80-120 nits, which is generally recommended for print work).
- The M4 iPad Pro has an XDR display which is outstanding (possibly the best consumer display on the market) and has HDR editing support in Lightroom and Photomator. You can also use it as a small HDR monitor via Apple Continuity.
- Budget-friendly options:
- The primary concern with the budget range today (aside from TVs) is that color accuracy is limited to the results from the factory, as you cannot use standard ICC profiling for HDR. Additionally, haloing tends to be more of an issue for budget mini-LED monitors.
- The BenQ MOBIUZ EX321UX offers great HDR performance as decent color accuracy for ~$1,100 (see details below or my full review).
- If you mount it correctly (a few inches back and lower than a typical monitor), a 42″ TV can work very well and can be calibrated with tools like CalMAN. The LG C5 is an outstanding option.
- Xiaomi offers 1,000-nits HDR for ~$350 and AOC (with limited dimming zones) for ~$260.
- No-cost options (you likely already have 1 or more HDR-capable displays):
- Your Apple laptop (especially the M1 and later MacBook Pro).
- Your TV (especially an OLED). If you bought it in the last few years, you very likely can connect your computer via HDMI for proper HDR display. See my free e-book for tips to setup your TV for HDR display from your computer.
- Your smartphone. Most iPhones and Android phones have offered great HDR displays for years, there’s a very good chance you own one. Adobe Lightroom supports HDR viewing and editing, Android supports HDR photos in the browser, Apple supports HDR AVIF in the Photos app (and JPG gain map support for Photos / iMessage has been announced for iOS 18).
[Disclosure: This post contains affiliate links. I rarely endorse other products and only do when I think you would thoroughly enjoy them. By purchasing through these links, you are helping to support the creation of my tutorials at no cost to you90
Important HDR considerations
There are several considerations for an HDR monitor:
- HDR support is mostly a matter of the right monitor if you use modern Mac/PC:
- Any HDR-capable monitors or TVs should work very well with MacOS 15+ (MacOS 26 is ideal for Safari support) or Windows 10+ (but Windows 11 is ideal). Linux support is available but apparently more limited.
- You’ll need HDMI 2.0 / DisplayPort 1.4 or better.
- Your GPU hardware generally does not matter (old drivers or wrong settings may need to be addressed to enable HDR mode on Windows).
- If you are in a store, use my tests and sample images on any display you wish to evaluate: gregbenzphotography.com/hdr/#tests
- Peak brightness (in nits, aka cd/m^2).
- 1,000+ nits is where HDR gets truly exciting in general. Anything in this range will look excellent for HDR in a range of viewing conditions.
- The “sustained” or “typical” brightness is also important. This measures the maximum brightness you could show across the entire screen. Mini-LED almost always does well here, but OLED nearly always shows a significant falloff. So rather than just focus on the peak brightness, the key measure is the Display HDR rating (Apple does not certify, but anything they brand as “XDR” is outstanding and should pass Display HDR 1000 standards).
- Anything rated Display HDR 1000 or greater will be excellent in a range of conditions.
- Lesser OLED can also look amazing if you can keep the ambient light low (dark room or working at night). In those conditions, Display HDR 600 “true black” looks very good and will support 2-2.5 stops of HDR headroom.
- Those same displays will show a 1000 nits peak and the reason they are certified to a lower Display HDR number is because they cannot support that brightness for more than typically 2-3% of the display.
- Put another way, they will be less accurate for editing content because the display will dim when you have too much bright content (which may result in you editing your images too bright). For that reason, the Display HDR 1000 True Black offers a more accurate display for editing (the 600 level is sufficient for content consumption but is a bit borderline for creators).
- Avoid any monitor with <600 nits peak. The HDR experience will be limited, and in some cases HDR mode can be problematic with the cheapest monitors.
- Mini-LED vs OLED
- Generally, mini-LED will be more accurate for photography than OLED as it tends to have little dimming (ie EOTF tracking error with bright content, which isn’t reflected in the standard 10% windows for testing as much as you’ll see with real images).
- However, multi-layer OLED (such as the tandem stack OLED used in some XDR iPads) can offer excellent sustained brightness.
- Mini-LED’s main weakness is haloing, which is of little concern for photography with most monitors which were launched in 2024+ (some older monitor designs are still sold new or you may be buying used).
- Mini-LED tends to have slower response time (making them less desirable for gaming), but most new mini-LED will offer 120Hz+ (60 is ok, but 120 is ideal for scrolling / panning in photos or other use).
- For mini-LED
- A high zone count is a good sign to minimize haloing, but does not tell the whole story. Great software and backlight control also matter, so don’t get hung up on those numbers. Try my HDR quality tests (ideally in a dark environment) to evaluate potential haloing.
- Additionally, the “native contrast” matters (greater contrast inherently means better ability to keep shadows dark without local dimming). An IPS (“in-plane switching”) panel will offer typically only 1000:1, while a VA (“vertical alignment”) panel may offer anywhere from 2000 to 7000 : 1. However, a VA panel may be more prone to dimming and color shift when viewed from an angle (try moving your head around to check, and watch for how corners appear when you sit in front of the display).
- For OLED displays, it is also important to review “sustained” or “typical” brightness or DisplayHDR certification.
- Mini-LED monitors tend to be much brighter than OLED at the same reported peak brightness. For example, a 1,000 nits mini-LED might be able to show that brightness across the entire screen, while a 1000-nits OLED might only show 1-10% of the screen at that level (and perhaps only a few hundred nits if you try to max out the display).
- Other than “tandem” OLED displays (such as the Apple XDR display in the M4 iPad Pro), most OLED’s will have significant limitations for full screen brightness relative to the reported peak value.
- Manufacturers may communicate performance under these limitations as “sustained” (which is useful and generally means full screen capability) or “typical” (which is not a defined term but should give you some rough idea of what it can do in larger areas). A much more useful spec is the DisplayHDR rating, if the display has been tested/certified.
- In general, anything with a 1400 or 1000 nits DisplayHDR certification list will likely offer impressive HDR.
- Anything certified as Display HDR 600 True Black (which means OLED) should be a good option for use in darker environments. I wouldn’t buy a display for the 400-500 level, but it’s useful if you happen to already have it.
- Deep blacks
- HDR quality is ultimately about achieving a greater dynamic range, and having a washed out black (not truly black) reduces dynamic range. How much you benefit from deeper blacks depends on your ambient environment. A bright room (or one with bright lights) will reflect light on the screen and may significantly reduce the apparent value of deep blacks.
- Most monitors use a backlight to illuminate multiple pixels This is known as a “transmissive” display because the light is transmitted through the pixels (rather than emitted from each pixel individually). The LCD restricts the light to create pixels, but it cannot block 100% of the light, so black pixels are not truly black.
- This also may show “blooming” where black pixels near bright pixels show as grey because those pixels share the same backlight.
- The best transmissive displays use “full array local dimming” (FALD). These use more than one backlight so that dark areas in the image may use a darker backlight or perhaps turn it off entirely. This allows for much darker blacks as it reduced bleed through, and often allows for true black in pixels which are not near bright pixels.
- There are many variations of this approach and those with <100 zones don’t offer a lot of benefit. Look for ideally 500+ local zones.
- Some monitors (such OLED or future “micro” LED displays) are “emissive” displays which emit light directly from the pixel. These monitors offer true black and significantly improve dynamic range (particularly when viewing in environments without bright ambient light).
- You may see such monitors marketed as having “infinite” contrast (since you’re dividing the brightness white pixel by a black pixel that is considered to be 0 nits).
- The difference with black levels will be very obvious when viewing FALD vs OLED in a dark room with content such as a star field (stars in the black night sky). These small bright areas will force a lot of backlight to affect the blacks in the FALD, while the OLED will retain deep blacks. So content which mixes small bright areas near deep shadows will suffer on FALD when viewed in a room dark enough to discriminate between true black and the monitor’s minimum black.
- Contrast ratio:
- 600+ nits are often a great sign for quality, but not the entire story. Make sure the display offers a very high contrast ratio. 1000:1 indicates you’re mostly getting bright SDR (blacks won’t be very dark). The ideal is 100,000:1 or more.
- Anti-glare coatings:
- Related to deep blacks and high contrast is the risk that a glossy monitor coating may create distracting reflections.
- If you see clear reflections in a display in the location (and you could hold a phone or tablet in the area to help test), you may benefit.
- On the flip side, anti-glare coatings tend to diffuse ambient light and may create an elevated black level if there is much ambient light (internal reflections probably aren’t a concern with dark ambient light, so blacks should improve under dark / night conditions).
- Calibration / Profiling
- There is currently no ICC standard for HDR. As a result, it is important to get a monitor which is reasonable to highly accurate out of the box (ideally deltaE <1) or which supports hardware calibration in the monitor itself. You cannot use typical consumer colorimeters to profile HDR displays at this time (aside from supporting MacOS Fine Tune calibration for Apple displays).
- Apple’s XDR displays are both accurate and support some unique Apple options for calibration.
- ASUS ProArt monitors support hardware based calibration through their software utility.
- HDR TVs offer a range of controls and some HDR monitors have controls such as RGB gain which may be used to help improve accuracy of the device. This works best if you use software like CalMAN to help test color accuracy (generally the EOTF for HDR displays is not well described or something you can easily validate). TVs sold in the last couple of years tend to offer pretty decent color accuracy out of the box.
- VESA DisplayHDR ratings can be helpful, but have some limitations you should be aware of:
- Many great products are not rated (this includes all Apple displays, and their XDR displays are the gold standard for consumer HDR).
- Their test methodology for peak brightness is helpful, but their contrast tests have been criticized for allowing high ratings for monitors which lack local dimming (ie, poor blacks / dynamic range).
- Why might a monitor have “1,000 nits peak brightness” and yet only certify to “DisplayHDR True Black 400”? Most likely because the peak brightness either does not include enough pixels or cannot hold that level of brightness for a long duration. The display must be capable of showing the certified brightness in at least an 8% window, among other requirements. See the actual test specs here.
- Ports:
- The bandwidth used for your display’s connection needs to support HDR (10-bit), resolution (such as 4K), chroma sub-sampling (444 is ideal for high resolution color), and refresh rate (you need at least 60Hz and 120 is ideal in photography for panning and zooming – plus other uses such as scrolling text).
- Your bandwidth is about 3x higher if your connection supports DSC (Display Stream Compression).
- Minimum requirements for HDR:
- HDMI 2.0 supports 4K HDR with 422 color at 60Hz (DSC is not supported). This is limiting, and HDMI 2.1 is clearly preferable.
- DisplayPort 1.4 supports 4K HDR, with 444 color at 90Hz or 420 color at 144 Hz uncompressed, or up to 444 240Hz with DSC.
- Note that Thunderbolt3 / USB-C with DP Alt Mode support both HDMI 2.0 and DP1.4.
- Ideal for HDR:
- HDMI 2.1 supports 4K HDR with 444 color at 120Hz (240 with DSC), or as much as 8K 444 at 120Hz with DSC.
- DisplayPort 2.0 supports up to 4K HDR with 444 color at 120 Hz uncompressed or up to 8K with 444 and 240Hz with DSC.
- Note that Thunderbolt4 / USB4 support DisplayPort 2.0 (there is no HDMI 2.1 Alt Mode over USB-C).
- Use a good HDMI cable
- cheaper cables may lack HDR support in long lengths, and tend to be stiff, bulky, and hard to store.
- I love the FIBBR 25 foot HDMI cable (note that fiber-optic cables are directional: you need to plug the end marked as #1 into the computer and #2 to the TV).
- How does the monitor look with a reference image?
- There is no substitute for seeing the monitor yourself (just keep in mind that a great monitor may look terrible if the in-store settings are not correct).
- If you are comparing monitors in a store, use Google Chrome to view my tests and example HDR images. Be especially sure to use test #8 to check the HDR headroom. This shows the real HDR benefit (keep in mind the display brightness directly impacts HDR headroom, so try dimming the monitor).
- Note that that you can adapt brightness of your HDR display. It is important to adapt this slider so that standard content is not too bright, which will likely have the added benefit of leaving you with greater HDR headroom.
- Check system settings to ensure HDR is enabled in your operating system display settings.
- in Windows 10+ go to Display Settings / HDR and adjust the SDR / HDR Content Brightness slider. Try to use 0-50 (if this slider is set too high on a 400 nits monitor, you won’t have any HDR headroom at all).
- in MacOS v15+, go to System Setttings / Display to adjust the brightness slider (when in HDR mode).
- At the correct brightness this page should be comfortable to read.
- Non-HDR considerations:
- Look for a monitor which covers most or all of either the P3 or Adobe RGB gamut. Most HDR images will still look with a limited sRGB gamut, but don’t limit yourself to colors from the ’90s.
- You can experience HDR at any resolution and 4k resolution isn’t very important for photography with even 32″ monitors. Unless you’re editing 4k video, this is a place to consider saving some money.
- If you are going to evaluate images for print with your HDR monitor, all the standard considerations apply in terms of even illumination, etc. That said, I’ve made a lot of large prints using a budget monitor with proper calibration and profiling. Learn more about considerations for printing with HDR workflows here.
- High refresh rates are helpful for gaming, but not important for photography – and you may need use less than the maximum refresh rate in some setups to use HDR.
- GPU / video card / codec
- Microsoft customer support indicated that there is no specific GPU or video card requirement to enable HDR in Windows 10 or 11 so long as you have an HDR monitor.
- I’m not 100% confident that there aren’t exceptions to that, but I am not aware of any at this time.
- Apple explicitly lists their compatible HDR hardware here.
- Considerations for testing in a store: There are numerous scenarios where HDR may not look optimal in a default store setting even for a great HDR monitor. Be sure to check all the following:
- Make sure you pass test #1 on my page. If HDR headroom is not showing 1-4 stops: make sure HDR mode is switched on in the operating system settings, that you set the display as an extended (not mirrored) display in Windows, check that the external monitor’s controls are set for an HDR signal, and that the display brightness is not set too high if the monitor only supports 400-600 nits.
- If you pass test #1, but test#2 shows a clipped gradient: that is likely because there is a ICC profile in use, try switching back to sRGB or the factory profile. This may also be caused by 3rd party software (I have seen this with both ASUS and MSI laptops).
- One brand at CES 2024 showed soon-to-be released monitors which showed hard to read text in HDR mode (some very bright white edges to black text). The root issue was the sharpness setting in the display settings, setting it back to 0 fixed the issue. Hopefully it won’t ship with this as a default in the final shipping product, but I want to mention as it looked terrible on both their miniLED and OLED monitors until I changed this setting.
Everyone has different needs
Different photographers will have different needs based on budget, color accuracy concerns, size requirements, etc. And you may also care about gaming or other uses like video. So a few things to consider:
- Budget: You tend to get what you pay for. I have a super-cheap 600 nits PC laptop and the display is pretty awful in terms of color accuracy and deep shadow detail – even though it is OLED. As time goes on, we should see great monitors at affordable prices, but be careful with any deals that seem too good to be true.
- Refresh rate: If you’re a gamer, mini-LED refresh rates / response times tend to be much slower than OLED and may not meet your expectations. QD OLED should help brightness and may be ideal if you can’t keep ambient light super low. But otherwise, mini-LED is probably a great choice for most photographers as they tend to offer better peak brightness for working in bright ambient conditions.
- Gamut: Anything with a high percentage P3 coverage is probably great. If you buy WOLED or another technology which uses a white sub-pixel for brightness, you might be limited more towards sRGB and I would try to avoid that if possible. You do not need high coverage of Rec2020, and there may even be some downside risk for color appearance (observer metamerism) due to narrow power spectral distribution for many ultra-wide gamut displays. AdobeRGB coverage is ideal for print (as it includes printable colors outside P3 for green/cyan), but isn’t emphasized by many monitor manufacturers.
- Resolution: Opinions vary here for printing (for evaluating sharpness), but I don’t think there’s any concern unique to HDR here. If you print much, you know what you need or are comfortable with. If not, I wouldn’t overthink it. I would personally be comfortable on a wide range of displays (it’s more about how you use it, be sure to stick with zoom factors which are multiples of 100%).
- Charging and ports: Until we have an abundance of good HDR displays, I wouldn’t worry about using your monitor as a USB hub or charging cable. Just get a decent USB / Thunderbolt dock if the monitor doesn’t include your ideal extras.
Best HDR monitors
External monitors are of course required for desktop computers or for seeing images on a large screen when working with a laptop. Unfortunately, price points for the best HDR monitors remain quite high, but there are already several great options. I’ll offer some specific options to consider below, but first let’s take a look at the most important considerations.
I have not had the opportunity to test many of the following monitors significantly, but believe they are well worth considering based on their specifications and/or my experience with them in stores. I’ve marked them as “promising” to indicate my lack of in-depth experience. I’m including my rationale as to why I feel they are interesting, so that you may help determine if any of these are ideal for your needs:
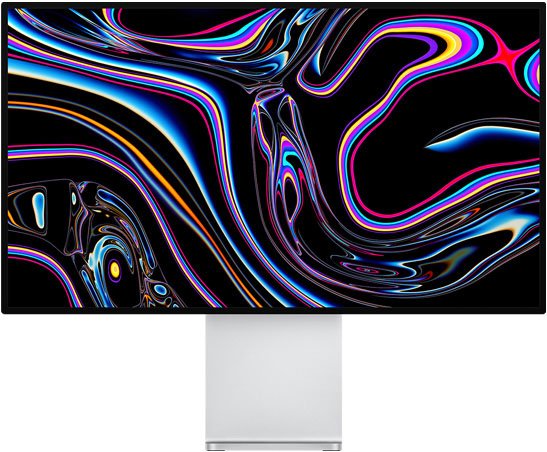
- Best in class: Apple Studio Display XDR ($3,300-3,600; see latest price on B&H or Amazon).
- See my full review.
- This is the best 27″ display available for MacOS and likely to remain so for years to come. It is not cheap, but it offers excellent value and unmatched performance, quality, offers superior ease of use, and no audible fan noise.
- 2,000 nits peak for up to 4.6 stops of HDR headroom.
- Covers both the P3 and Adobe RGB gamuts, which makes it ideal for editing for both HDR and print.
- The factory accuracy plus sustained brightness ensure an incredibly accurate display without the need for calibration (though that is supported for those who demand extreme levels of performance).
- Best in class: ASUS Pro Art PA32UCXR (~$2,800; see latest price at Amazon or B&H)
- See my full review.
- This is an outstanding monitor that compares very well against the Studio Display XDR:
- It offers a larger 32″ size and lower price point.
- However, the Studio Display XDR offers simpler setup (especially under MacOS), no fan noise, better support, reference modes, and higher resolution.
- 1,600 nits peak (I actually measure up to 1,750 nits) with 1,000 nits full screen brightness (DisplayHDR 1400), quantum dot mini-LED with 2,304 dimming zones.
- Also includes 4k resolution, a very nice stand, 99% Adobe RGB coverage, 97% P3, 85% Rec2020. This is a great gamut great for HDR but also optimized to support print workflows.
- Self-calibrating: Built-in calibration hardware can run on its own (even without a computer or scheduled off hours). Also supported by CalMAN / ColorSpace. ΔE < 1, see ProArt Hardware Calibration
- Supports Dolby Vision (and HDR10, HLG), dual Thunderbolt4 with 90W power delivery, HDMI 2.0, DisplayPort 1.4 and a built-in USB Hub (one Type-C, 3 of the older rectangular Type-A, all support USB 3.2 Gen 2).
- Excellent: ASUS PA32UCDM (~$1,700, see latest price at B&H or Amazon)
- You can also get the ASUS PA32UCDMR-K ($TBD, see latest price at B&H), which has the same monitor specs and is bundled with their new CaliContrO colorimeter (which has extra abilities to also control the on screen menus).
- See my full review.
- 1,000 nits QD-OLED
- Great accuracy (ΔE < 1): Built-in calibration hardware can run on its own (even without a computer or scheduled off hours). Also supported by CalMAN / ColorSpace.
- Also offers 31.5″, wide color gamut (99% P3), 4k resolution
- This is an outstanding monitor for both MacOS and PC: net cost is ~$700 less than the PA32UXCR (given you will likely still need to spend ~$270 for this monitor), has great headroom, the perfect blacks of an OLED, supports HDR calibration, pass-through charging, and downstream USB connectivity. Highly recommended.
- The key benefit of this OLED monitor over the PA32UXCR is cost (halos / deep blacks are better, but this isn’t a stand out benefit). However, that more expensive monitor offers more HDR headroom and even more importantly avoids most ABL (i.e. it is more accurate for editing as it won’t typically dim with bright content).
- Alternatives to the PA32UCDM (do not buy these unless you’re able to get a significantly better price on sale or used):
- Promising: ASUS PG32UCDM ($1,200; see latest price on Amazon)
- You may consider this to save ~$600, but will not achieve the same color accuracy until we have an ICC standard for profiling in HDR mode (calibration is only in ProArt models).
- Accuracy should be decent for general photography, but would not be ideal if you are someone who prefers to profile their monitor
- 1,000 nits QD-OLED (Display HDR400 certified).
- Also offers 32″, 99% P3, 4k, ΔE < 2, 10-bit.
- Promising: Dell UP3221Q (~$2,000; see latest price at B&H and Amazon) **
- 1,000 nits mini-LED (DisplayHDR 1000) with ~2,000 local dimming zones
- Also offers 32″, wide color gamut (99.8% P3), 4k resolution, built-in colorimeter, Thunderbolt 3 (in addition to DisplayPort / HDMI), good accuracy (ΔE < 2)
- Note: buyer reviews on Amazon mention concerns with display uniformity (though other comments on B&H don’t suggest issues), so be sure to buy with an option to return if you are not satisfied.
- Promising: ASUS PG32UCDM ($1,200; see latest price on Amazon)
- Excellent: ASUS ProArt PA27UCDMR (~$1,300; see latest price at B&H)
- This is the 27″ version of the excellent PA32UCDM (see above).
- Very promising: ASUS PA32UCX-PK ($1,800; see latest price at B&H and Amazon).
- 32″ mini-LED featuring 1,200 nits and 1,152 zones (DisplayHDR 1,000)
- includes X-rite Calibrator and support for calibration in the hardware
- Also features: 4K, 99% DCI-P3 99.5% Adobe RGB, ΔE < 1, 10-bit.
In general, anything with a 1000+ nits DisplayHDR certification list will likely offer impressive HDR. Anything certified as Display HDR 600+ “True Black” should be a good option for use in darker environments.
==> Only buy monitors I marked as “promising” if you have tried one yourself or can return (as I have not personally tested them).
==> ASUS support allows returns in the US within 30 days of ordering. They will give a FREE return shipping label. A non-defective return may be subject to a possible 15% restocking fee (at their discretion, and I suspect this is not often applied for products returned in original condition with all the original packaging, etc). I would contact them to know the return policy for other countries, but this seems like a reasonable option if you’re interested but wish to get hands on experience to confirm one of their products for your own use.
Best budget HDR monitors (<$1,200)
- Be sure to see TV options below, as there are great price points and TVs support calibration in the hardware.
- Excellent: BenQ MOBIUZ EX321UX (~$1,100; see latest price on Amazon or B&H)
- See my full review.
- 1,000 nits mini-LED with 1,152 local dimming zones.
- Also offers 32″, 4K, 99% P3 / Adobe RGB, and 144Hz refresh rate.
- Note that while this is marketed as a gaming monitor, BenQ tends to offer more accurate color out of the box and includes an option for more accurate sRGB or P3 while in an SDR mode. That makes it a more suitable option for supporting both HDR and print (SDR).
- Very promising: Gigabyte 32″ AORUS FO32U2 (~$800, see latest price on Amazon)
- 1000-nits QD-OLED monitor (DisplayHDR TRUE BLACK 400)
- Also offers 32″ 4K, 99% P3, 10-bit color depth
- Note there is a “pro” version of this (FO32U2P) for $200 more. It just adds DisplayPort 2.1 (vs DP 1.4, and no change to the HDMI input). Unless you are a gamer, you do not need that upgrade (it allows higher refresh rates you won’t need).
- Very promising: Dell 32 Plus 4K QD-OLED S3225QC ($850, see latest price on Amazon)
- DisplayHDR 400
- 32″ 4K QD-OLED
- Promising: LG UltraGear 32GX870B ($1,400, see latest price at B&H)
- 1,300 nits peak (DisplayHDR True Black 400)
- 31.5″ 4K OLED offering 240 Hz at full resolution (480 Hz at 1080p)
==> Be careful with the low end of the market, there’s definitely some junk out there with “HDR” slapped on the box. If the display offers less than 1,000 nits and DisplayHDR 600 certification, it will likely not offer a good HDR experience. Try going to a store to compare the best and worst HDR monitors. Viewing my HDR tests and images on Google Chrome is a quick way to see for yourself.
Gaming monitors
I would be somewhat careful with gaming monitors for photography as they often lack high color accuracy or ways to calibrate. Depending on the model, they may show color fringing in fine details (such as text) or have curved monitors (which can cause more reflections from ambient light). They generally aren’t designed with photographers needs in mind, but color accuracy issues will hopefully be addressed at some point in the future with support for ICC based profiling. If you do a lot of gaming and photography is just one consideration for you, a gaming monitor may be a great choice. A few to consider:
- Promises good value: 27″ AOC Q27G3XMN (~$300; see latest price on Amazon)
- 1,000 nits mini-LED (VESA DisplayHDR 1000) with 336 dimming zones
- This is a budget-friendly monitor which is 27″ with 2K QHD resolution (2560×1440).
- Excellent value (with caveats): Xiaomi Mini LED Gaming Monitor G Pro 27i (~$350; see latest price on Amazon)
- See my full review for more details.
- This is a great option to consider if you want to get into HDR at a low price point.
- 1000 nits mini-LED with 1152 dimming zones for only $330!
- This is a budget-friendly monitor which is 27″ and does not support 4k (offers 2K QHD: 2560×1440).
- Color accuracy is reasonable (ie, visibly not accurate but close enough many photographers will be happy with it).
- Neutrals are shifted red and HDR color is somewhat over-saturated, but color accuracy better than most HDR gaming monitors I have seen.
- There are no options to calibrate in HDR mode (since there is no standard for ICC profiling in HDR mode), so the out of the box color is what you get for HDR.
- If you need calibrated color for print, you can simply switch to SDR mode and do normal profiling there. You cannot leave a custom profile active when you use HDR mode or you’ll see clipped results. When you toggle HDR mode in Windows 11 or MacOS Tahoe, the color profile is sticky to that mode (older versions of MacOS may require you to manually switch the profile too, or consider using BetterDisplay as noted here).
- Highlight details appear very slightly clipped / compressed.
- It would be easy to work around this in editing if it bothers you by thinking of it as slightly less headroom.
- It’s pretty hard to find examples where this affects the viewing experience in a browser. If you look at the bright right side of the arch in this image, there is some loss of detail. You’d have to be pretty picky to notice / care.
- Local dimming is generally good.
- Bright halos are excellent when viewing directly at the monitor (even better than the Pro Display XDR for very dark detail), but this performance is extremely sensitive to the angle of view. As soon as you are slightly off-axis, the local dimming halos are much more prominent. So it’s black levels will appear better than the XDR in the center of the display (assuming you’re sitting directly in front of it), while the left and right edges will not be nearly as good. But these are very deep black levels and I have no concerns.
- Halos for bright HDR against solid midtones are visible, but I have not seen problems in analogous real world photos (such as sunsets behind a building).
- I see minor “dark halos” in my tests, but it is not a concern and you’re unlikely to see it.
- I have had some minor HDMI issues
- It may not work with some lower quality cables. I could not get Windows / MacOS to recognize this monitor as HDR-capable when using an HDMI cable which has consistently worked for other HDR devices.
- But HDR worked fine with a higher quality FIBBR cable. I highly recommend their cables (just remember that it is critical that the end marked “1” goes to the computer and “2” to the monitor – it will not work if you plug it in backwards).
- Settings on the monitor did not seem to be a factor, only the cable.
- I have had zero issues when using the provided DisplayPort cable.
- If you need customer support, contact [email protected]. I received a helpful response in less than 24 hours on the weekend. (I had no luck with their FB support channel, and there is no phone support in the US).
- Very promising: ASUS 27″ PG27UCDM OLED (~$1,100, see latest price on Amazon or B&H) **
- 1000 nits peak brightness (DisplayHDR 400 True Black)
- Also features: 4K QD-OLED, 99% DCI-P3, true 10-bit color
- Alternatives which use the same 4th-gen Samsung 5 layer tandem QD OLED panel as the PG27UCDM:
- Promising: 27″ Acer Nitro XV275K (~$650, see latest price on Amazon) **
- Display HDR 1000, 4K
** I have not personally tested these devices or have very limited experience with them. I have tried a a good selection of 400-1000 nits displays and believe the above are likely among the most appealing options.
Apple HDR laptops
If you want the best possible HDR experience in a laptop, Apple MacBook Pro (M1 or later) is the hands-down winner. See my reviews of the M1, M2, M3, and M4 (including details on which options you should purchase and where to save money).
The M4 is the best yet, with its nano-texture option and 1000 nits SDR support making it the best laptop for working in bright ambient light (such as traveling for landscape photography). I have updated every year since launch, they are all amazing. They don’t have to cost much either (I recently bought a used 16″ M1 Pro for $500 in excellent condition).
Apple may have a reputation for being premium pricing, but I belive the MacBook Pro is the best value out there. You get a best-in-class 1,600 nits Retina XDR display, blazing fast performance, excellent battery life, and outstanding quality and customer support. I recommend the 14″ if you want to travel light, the 16″ if you want the best screen, upgrading to 32GB of RAM if budget allows, and an internal drive that covers your essential needs.
Beyond that, almost all Apple laptops since 2018 support at least some level of HDR (see the support list). Any Apple displays branded as “XDR” (such as the M1 MacBook Pro, recent iPads, etc) is outstanding.
Windows HDR laptops
Unlike Apple laptops, many PC laptops do not yet support HDR. But there is a quickly growing range of options with moderate HDR support. If you are open to Apple and use laptops, the MacBook Pro objectively offers the best HDR display for photographers. However, Lenovo has started to offer some great laptop HDR displays, and others will surely follow.
Here are some Windows laptops offering high levels of HDR display:
- Very promising: ASUS ProArt P16 (H7606WX) (~$4400, coming soon)
- This is the only PC laptop I would consider a relatively direct competitor to the MacBook Pro with outstanding HDR display and substantial RAM / SSD storage.
- 1,600 nits peak brightness, certified DisplayHDR True Black 1000 (which means at least 500 nits full screen brightness and should therefore hold up very well against 1,600 nit mini-LED displays for most content)
- Also offers 16″ size, deltaE 1, 4K, touch screen, 100% P3, 120Hz, 2TB SSD, 64GB RAM, 24GB RAM for the NVIDIA GeForce RTX 5090, 2 expansion slots (one is used for SSD but this may imply potential to install a second 2TB SSD – not clear to me).
- Ports include: SD card reader, 2 USB-C ports (one is USB 4 and the other is USB-3.2), 2 USB 3.2 Gen 2 type A ports, an audio combo jack, a DC-in port, and an HDMI 2.1 port.
- This is an outstanding mid-tier laptop.
- The weight is roughly 1/2 lb lighter than a 16″ MacBook Pro, making it much more travel-friendly with a large display.
- The weak spots here appear to be ports (only a single fast USB-C port) and a proprietary charger (not USB-C). For comparison, a MacBook Pro offers 3 fast USB-C ports and the ability to charge through them (or the MagSafe connector).
- There is no premium option for the SSD (MacBook Pro offers up to 8TB if you have the budget).
- Unlike the MacBook Pro, there is no small (14″) or lower cost (as little as $1500) option with this great display. If that’s you, see the Lenovo below.
- See full specs here.
- Note that there are lower cost tiers of the P16 which offer only 500 nits (ie barely HDR), so be sure to get model H7606WX-XH99T.
- Very promising: 2026 ASUS ExpertBook Ultra, model B9406CAA (~$2500, coming April)
- Anti-glare display, 1400 nits peak (Display HDR True Black 1000)
- Also offers 14″, Tandem OLED, 3K (2880 x 1800), Touch screen, 100% DCI-P3, Pantone Validated, 32GB RAM
- Very promising: ASUS 14″ ZenBook Duo (UX8407) (~$2,400, see latest price at B&H)
- This unique laptop has TWO 14″ ASUS Lumina Pro OLED” HDR displays.
- Both offer Display HDR True Black 1000, 1,600 nits peak, 3K (2880 x 1800), 100% P3, 120Hz refresh, and support touch screen / stylus input.
- They claim deltaE <1 (Pantone validated). I saw this display at their CES booth and it looked great.
- It offers a nice budget alternative to the ASUS P16: it is about half the price, should be reasonably close in CPU performance if using the premium Duo processor but has significantly lower GPU capability, half the RAM, likely offers longer battery life, is about 13% smaller but 27% thicker, weighs 15% less and while the screens are 14″ instead of 16″ – you have two and could easily configure LR / PS to put tools on one screen and see the image full size on the other.
- Excellent: 2025 Yoga 2-in-1 Aura Edition ($1,600-1,900, see 14″ and 16″ listings at Lenovo)
- See my full review.
- 14″ or 16″ 2.8K OLED certified DisplayHDR 1000 True Black
- Note that the pricier 4K display is only certified to Display HDR True Black 600, so do NOT upgrade the resolution (the default 3K resolution is great and the HDR is much better).
- Also offers up to 32GB RAM, 1TB SSD.
- If you need more premium performance, see the ASUS ProArt P16 above.
- Note: Lenovo has some similar great displays with SnapDragon (ARM) processors. While that hardware is exciting, you should still with an Intel / x86 process for now. Software support is limited for WinARM, making this not a great platform for most photographers (for example, Adobe software will not support UXP plugins like Web Sharp Pro & Lumenzia under WinARM).
HDR TVs:
A large number of HDR TVs have been on the market since about 2016. If you’ve bought a big screen TV in the past few years, there’s a good chance you have one. I’ve tested my ~750 nits Sony TV using an HDMI connection from various MacBook Pro laptops and it looks amazing (~3 stops of HDR headroom). I’ve heard great feedback from video editors and gamers about the following models:
- Excellent: 42″ LG C5 or C6 (~$1,000, see latest price at Amazon or B&H).
- Offers 1,300 peak nits in an OLED.
- Outstanding accuracy in filmmaker mode, and supports auto-cal with CalMAN.
- Note that the newer C6 offers the same performance at 42″ (only the 77/83″ models got brighter than the C5), so the C5 is ideal to save money.
- The C4 is just as good for use as a monitor and I would get that if you can still find one in stock to save a few bucks.
- The C2 and C3 are also good used options.
- Very promising: Samsung 43″ QN90D (~$800, see latest price at Amazon or B&H)
- Offers ~2000 peak nits, mini-LED
- This is an ideal choice in a bright room.
If just you want a great TV (not to use as a monitor), there are even better options when you go larger than 42″. The following models are excellent:
- Excellent: TCL X11L ($7-10,000, see latest price at Amazon)
- Features 10,000 nits peak, ~20,000 dimming zones, and 100% Rec2020 coverage thanks to its “Super QD” mini-LED.
- That is technically the full HDR target, which is incredibly impressive. In reality, peak will likely be lower after calibration and sustained brightness will be much lower (various tests suggest 4500 nits for 10% test windows). But any way you look at it, this is likely to be the most complete HDR volume coverage of any TV on the market.
- Excellent: Sony Bravia 8 – mark II (~$3,000 for 65″, see latest price at Amazon or B&H)
- This is the upgraded A95L, but not available in the a large (77″) size.
- 2200 nits peak, OLED
- Excellent: Sony A95L ($4,000 for 77″, see latest price at Amazon or B&H)
- Outstanding OLED which has won numerous awards. Sony’s best if you want 77″.
- 1400 nits, OLED.
- Excellent: Sony Bravia 9 ($3,200 for 75″, see latest price at Amazon or B&H)
- up to 4000 nits peak, mini-LED
- Outstanding even in bright rooms. The Sony OLEDs offer wider gamut and an optimal if you only watch under controlled lighting.
- Very promising: TCL QM8K ($2,800 for 75″, see latest price at Amazon)
- 5,000 nits peak + 3,800 local dimming zones, QD mini-LED
Many people will get an excellent experience from an HDR TV used as a monitor, and of course this is an excellent option for casually showing HDR photos in your living room.
If you have a TV, you’ll probably need to do a few things to enable proper display over HDMI:
- You’ll need HDMI 2.0 in all links in the connection, so be check that the port on your computer or dongle supports it – and use a high quality cable. You’ll need to connect to an HDMI port support HDMI 2.0 or later. Not all TVs have this and TVs may only support it on some of their HDMI inputs.
- You may need to enable settings in the TV menus to use the full / enhanced range of the input. By default, it may not look for an HDR signal.
- You’ll need to enable HDR display in the computer settings.
- On Windows, avoid screen mirroring (seems to disable HDR). Set it up as an extended display to turn on HDR mode.
- Note that AirPlay 2 does not support HDR (same limit for Chromecast as far as I know)
- See HDR setup and troubleshooting for more info.
When using a TV as a monitor, it is critical that you set it up to get a good experience:
- Watch out for any default settings which require processing. TVs tend to have enough lag that your cursor will probably look sluggish with default settings. Gaming mode is designed to avoid this and would be a quick test.
- A TV is going to be large and you’ll need an appropriate area to set it far enough back to view it comfortably. TVs are not designed for viewing at a close distance. The pixel pitch (size) / resolution may mean that text does not look as crisp, though images should be fine. That’s not a problem for photos/video, but you’ll want to see that it supports everyday use if it will be your only monitor.
- You may also need to consider how you will mount it to ensure it is at the proper height (so you aren’t looking up to see the middle of the screen).
- Nearly all TVs can be calibrated for HDR use. This is a huge advantage over many HDR monitors, as only only a few (such ASUS ProArt and Apple) offer support for calibration in the hardware or high accuracy by default. However, calibration must be done through settings in the TV. Do NOT create a custom ICC profile, they are not yet supported for HDR and the result will be that all HDR content will be clipped.
- It is ideal to choose a model known for offering great color accuracy, or hire a professional TV calibrator. You can do it on your own, but it is technically complicated and the required hardware probably costs as much or more than hiring a professional.
- If you wish to calibrate yourself:
- You should generally disable enhancements settings which are meant to impress a general TV watching audience, but which may make the display less accurate.
- You may need special software like CalMAN for Home to help calibrate the display if you want to do to try to set stable and optimized settings. Note that CalMan for Home is sold for specific brands and some versions support Windows and some support Android (I don’t believe any support MacOS). Be sure to check the details, including whether your calibration hardware is compatible with this software. This kind of calibration has a steep learning curve, which you might avoid if there is a CalMAN tutorial on YouTube for your TV brand / model. Here’s one tutorial video to give you an idea of what to expect.
A TV is not a monitor, so there are some things to keep in mind as you review options:
- Some monitors may show a color shift at an angle, which means you might see color in the sides/corner which does not match the center of the display if you are too close to a large TV.
- It probably won’t power on and off with the computer automatically. There are numerous videos on YouTube showing how to setup settings or install software on your computer to help make this happen, so it is possible in many cases. Of course, you can simply use the TV remote or power button.
Calibrating / Profiling an HDR display:
There is currently no support for ICC profiles in HDR mode. As a result, using a custom ICC profile will break HDR at this time. If you are seeking the best possible color accuracy, these are the options:
- Get a display with high accuracy out of the box (such as Pro Display XDR).
- Get a display offering the ability to calibrate in the hardware (ASUS ProArt or a TV)
- Profile SDR mode (for more accurate print work), but use HDR mode with the factory profile.
- Just accept the accuracy of the display until we have options for HDR profiling.
Calibrite (associated with X-Rite) has released a few colorimeters designed to handle brighter HDR displays, including:
- Display Plus HL (highly recommended)
- Designed to handle up to 10,000 nits, which covers the full PQ spec (TVs get this bright, but monitors max out at 1,600 nits today).
- This is the only consumer colorimeter Apple lists as supporting their very useful XDR “full” calibration workflow.
- Display Pro HL.
- Designed to handle up to 3,000 nits. This offers great support for HDR monitors for years to come.
HDR phones:
You probably already have an excellent HDR display in your pocket. It is only a matter of time before phones are widely ready as there is already a massive installed base of HDR hardware.
The following phones all off great HDR displays and HDR support web browsing, the native photos app, Instagram, Threads. All iPhones and most Android are supported by Lightroom:
- 2,600 nits HDR: Samsung S24, S25, S26
- 2,200 nits HDR (3,300 nits outdoors): Pixel 10 Pro (no LR support yet)
- 2,000 nits HDR: Pixel 9 Pro
- 1,600 nits HDR (2,400 nits overall): Pixel 8 Pro
- 1,600 nits HDR (3,000 nits outdoors): iPhone 17 / 17 Pro
- 1,600 nits HDR (2,000 nits outdoors): iPhone 16 / 16 Pro, 15 / 15 Pro / 14 Pro
- 1,750 nits: Samsung Galaxy S23, Galaxy S22 Plus, Galaxy S22 Ultra. (these are not supported by LR Android)
- 1,400 nits HDR (2000 nits overall): Pixel 8
- 1,200 nits: iPhone 11-14, 11-13 Pro, 16e, 17e
- 1,000 nits HDR: Pixel 7 Pro
- (Note that despite 1,200-1,500 nits, user reports suggest there is no HDR support on Galaxy S20, S21, S22 – most likely either software support is limited or the display brightness is just dedicated for SDR use outdoors)
For the most complete support, use Android 16+ (OneUI 7+) and iOS 26+.
Note that the USB-C port on the iPhone 15+ (and HDR capable iPads) supports 4k HDR output. You can show HDR images from the Photos app over HDMI to your big screen TV.
HDR tablets:
Bright HDR displays for tablets are lagging, but should grow significantly in the years to come. The following tablets offer excellent HDR:
- 1,600-nits XDR OLED: M4+ iPad Pro. This offers one of the best HDR displays in any consumer device (including a highly accurate reference mode).
- 1,600 nits mini-LED: iPad Pro 12.9″ gen 5 (2021), gen 6 (2022)
- 930 nits OLED: Samsung Galaxy Tab S10 Ultra: this is the 14.6″ model. There is marginal benefit to the extra nits over the 11″ model, so I would get that if you want to save money or want a more compact size/weight.
- 750 nits OLED: Samsung Galaxy Tab S10: this is the 11″ model. This should compete very well with the iPad in darker environments given true black pixels. (~$800-$920 See latest prices on B&H).
What's your experience?
There are far too many displays for me to try much of what’s on the market. Please comment below if you have extensive experience using Photoshop / Adobe Camera RAW with any of the above or other HDR computer monitors. I’d love to hear your impressions.

