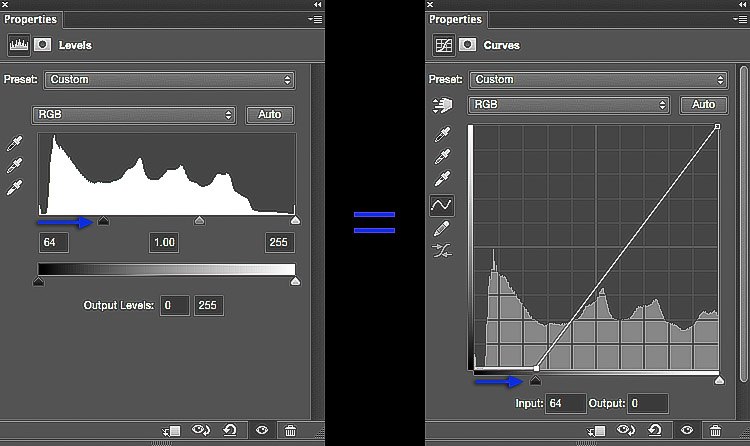
Curves and Levels are some of the best tools in Photoshop to enhance your photos. Both offer the ability to impact contrast, tone, and white balance. Curves offers complete control, but can be a little confusing to understand initially. On the other hand, Levels promises “simplicity” if you’re willing to give up some control. I’m throwing the quotes around simplicity because I actually believe Levels is more difficult to use, which I’ll explain below. But it’s good to understand both, especially if you’re familiar with Levels and want to try Curves.
Black/White Point
The black point and white point can be set in exactly the same way in both Levels and Curves. Anything darker than the black point becomes pure black. And anything brighter than the white point becomes pure white. Photoshop will simply remap the remaining value between your black and white set points. This is a nice way to boost contrast when your image doesn’t have a true black/white, which often occurs in low contrast scenes and under/over-exposed images.


Output levels
Both Levels and Curves have options to remap the output to a smaller dynamic range by changing the black/white output to some gray value. It’s easy to do this in Curves, but you have to drag the black/white curve point up/down (there is no slider like the one you get in Curves for this). I rarely use these adjustments. In fact, the only time I really use this is when I want to prepare an image for printing by a 3rd party lab (increasing your black output level from 0 to 8-10 works miracles with many vendors and avoids the common issue where the prints come back too dark). I suppose you might use this to intentionally reduce contrast (if you wanted to simulate for, for example).


The midtones slider
This is where the Levels adjustment falls apart for me. It has a certain appeal – move one slider and make the image lighter/darker without causing clipping black or white values. But you can do this by just sliding some mid-point in the Curves left or right. The problem is that the midtones slider changes brightness and contrast at the same time. Want to increase highlight contrast without darkening the image? Move the midtones slider right (boosts highlight contrast, but darkens the image), and the white point to the left (lightens the image to offset the midtone slider). How much should you move them? It’s pure guesswork. With Curves, you can use the visual adjustment tool to target tones visually from the image. Oh, and when you make this double-move in Curves, you are probably going to blow out your brightest highlights.

You may be wondering what Curves adjustment is equivalent to moving the midtone slider in Levels. Moving the midpoint of the Curve is pretty close (ie, grab 127 and slide left or right). However, Photoshop uses different math to connect the dots in Levels and Curves. To get an exact match, you’d have to use the multi-point curve shown below. I’ve overlaid them for comparison. You can see that the simple curve is darker in the shadows and brighter in the highlights. Personally, I believe the complex curve based on Levels is generally less useful, as it reduces midtone contrast to get more shadow contrast than you probably need (and eliminates a lot of the shadows).


Here’s a video that explains this in greater detail detail. In the video, I go through the comparison above, and show how you can use Curves to easily adjust brightness and contrast. I demonstrate how Curves can create better results.

