Adobe just added HDR( “High Dynamic Range”) support to Lightroom! If you haven’t experienced it yet, HDR offers the most significant improvement in image quality in decades (to be clear, this is completely different from the old “HDR” many of you know, this involves new display technology to actually show greater dynamic range). For the first time ever, we can actually display the full dynamic range of light captured in our RAW files.
LR support for HDR has been added everywhere, including LR Classic (v13), LR (ie cloud, v7), LR iOS (v9), LR Android (v9), and even partially at lightroom.adobe.com. It works just like Adobe Camera RAW (ACR), and offers numerous benefits. You can now edit, view, and export HDR images on iPhone, iPad, and Android devices. That’s a huge deal, as the majority of smart phones have HDR hardware. Additionally, you now have the convenience of using LR for managing images, editing with virtual copies, and exporting HDR in multiple formats. Export support includes HDR JPG gain maps to share images which look amazing on both HDR and SDR (“Standard Dynamic Range”).
Note: If you’re new to HDR, see my HDR JPG gain map gallery on an M1 or M2 MacBook Pro using Chrome, Brave or Opera to get a sense of what a great monitor can offer. Or if you’re trying to understand what to look for in an HDR monitor, see my recommended HDR monitors. And please see my e-book for more info on HDR.
How to edit HDR with LR:
You’ll need an HDR display. Setup is automatic if you’re using an Apple display or mobile device, however may need to do some setup to support HDR if you are using a PC or external monitor. See my tests to confirm support and troubleshooting if you don’t see test #1 show >0 stops of headroom.
Additionally, you should ideally enable “enable HDR editing by default for HDR photos” (found under Preferences / Preset in LR Classic and under Preference / Import in the cloud version). This will show as “HDR edit mode for new photos” in LR iOS / Android under Preferences / Import. This optional setting simply ensures the HDR mode is automatically turned on when you import an image which is already HDR (such as a 32-bit TIF). You can manually toggle the HDR mode later, this only affects the default at the time of import.
Once you’ve got HDR setup, the LR workflow is very simple. Just open an image in the develop module and look for the “HDR” button near the top of the Basic tab using the desktop or iPad version of LR. For iPhone / Android, it will appear as the “edit in HDR mode” switch near the bottom of the Edit / Light tab. They all do the same, it’s just a different layout for different screens.
If your image has a lot of bright content, just enabling HDR may show immediate benefit. If you see no change, your image didn’t have bright content (at least with current slider settings), but the goal isn’t to click the button and get immediate results for such an image. Enabling HDR gives you the room to push parts of that image into the HDR range. This makes HDR useful on any image. You can even use it on an 8-bit SDR JPG and get some great benefits.
The editing in HDR mode should feel nearly identical to the SDR editing you’re used to. The key differences are:
- The histogram will update to show an HDR range.
- The left side is SDR, and the right show 4 segments – each of which is an additional stop brighter than SDR.
- Some of the HDR region will be dimmed if your display does not support a full 4-stops of HDR headroom (this is common, especially for moderate capability displays or if you turn up your brightness very high, as that reduces the brightness reserved for HDR content). The available range for HDR on your display is known as HDR headroom.
- Note that the HDR headroom will update as you change brightness on MacOS, but on Windows will always show the value which was correct at the time LR was launched (so you should consider restarting LR if you alter brightness significantly on a PC to ensure accurate feedback).
- The numeric readout below the histogram works a bit differently
- HDR values will show the number of stops over SDR white (such as+2.3 for 2.3 stops over SDR)
- HDR values will show in red when clipped for your display or clipped in the data, and will otherwise show in orange when displayed without clipping on your display.
- It is only available as RGB (there is no LAB option in HDR mode). This can make it a bit more difficult to check shadow / midtone levels as you have to consider three channels instead of just the L value. More importantly, RGB values are color-space dependent and LR uses different color spaces for SDR and HDR. As a result, even a pixel which is rendered with the same luminosity and color will have dramatically different RGB numbers when you enable HDR mode.
- You may right-click the histogram to enable an option to display the SDR pixels as a percentage (rather than 0-255). The same caveat for numbers applies (ie, you might see 5% vs 25% for the same pixel when toggling HDR mode).
- The highlight clipping warning (top-right triangle in the histogram or <J>) shows a red/yellow overlay:
- yellow indicates pixels which are HDR and displayed properly on your display.
- red indicates pixels which are either clipped in the data or clipped on your display. If they are clipped in the data, they will look bad when exported. If they are clipped on your display, they may show properly if you turn down the brightness – and they will look just fine when exported to the web as a browser will “tone map” the image to fit the dynamic range limits of the display.
- The HDR limit dropdown lets you control the maximum HDR brightness allowed. The default 4 stops is great for most users. Advanced users may wish to expand or contract the range in some niche scenarios.
- Visualize HDR turns on a cyan/blue/purple/magenta overlay to show which pixels are 1-4+ stops into the HDR range. This can be very helpful to hit specific editing targets, as not every scene calls for using the full HDR range or you may wish to optimize for more moderate HDR displays.
- The “Preview for SDR Display” (may be hidden under “SDR rendition settings”) gives you 7 sliders which control how the SDR version of the image will be rendered. This would affect exports to a gain map, to standard SDR, or direct printing of the HDR.
- Curves will show an SDR and HDR range.
See my post on HDR editing with ACR for more information, as the controls work the same.
You may also use LR’s “merge to HDR” feature. This is the point where the old “HDR” meets the new. With the old approach, you could combine several exposures to increase the dynamic range of the data and then you would tone map down to the limits of your display. Now you can use the old approach to increase dynamic range of the data and display much more of it. You’re still creating data which exceeds the limits of your monitor, so this technique is of limited value and should only be used in a few niche scenarios.
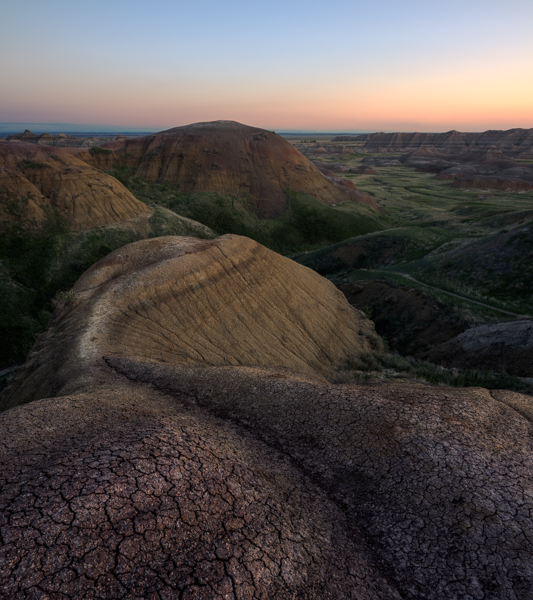
Here’s the image I edited in the video (and unlike the video, this photo should show with proper color):
How to export HDR images from LR:
Once you’ve created a great HDR edit, you’ll need some new options to export it in a way that preserves the HDRThere are a couple of good options for exporting HDR images from LR:
- Export via Web Sharp Pro (WSP) v6
- WSP exports HDR images which work properly on Instagram / Threads (LR exports valid HDR, but the gain maps are ignored by IG / Threads due to specific requirements of the platform).
- WSP gives you full control of the base SDR image, which significantly improves quality even for your HDR audience. See “great HDR requires a great SDR in the gain map“.
- WSP integrates tightly with LR. Just create your HDR edit, make a virtual copy edited to SDR (which gives you full control), then select both and use “edit in / open as smart object layers in Photoshop”, then simply click “Sharpen” in Web Sharp Pro (after setting it up as shown here). It’s just 1 click in PS / WSP to achieve a very high quality result.
- JPG with a gain map (turn on “HDR output” in LR Classic, the HDR gain map is automatic for mobile versions of LR)
- This format is ideal for sharing images to be viewed in a web browser, as the gain map will automatically show an image optimized for any display – even if it does not support HDR or gain maps.
- To optimize rendering of the image on an SDR or less-capable HDR display, you should tweak the sliders in the “preview for SDR display” section. These control the SDR rendition of the image which gets embedded into the JPG gain map.
- Use the sRGB color space if you expect to upload this image to social media or any site which may reprocess the image and strip the embedded profile. Otherwise, P3 is a great choice to retain the full color.
- See my HDR gain map gallery to see how these images automatically adapt on different displays.
- HDR AVIF (turn on “HDR output”)
- This format is ideal for sharing on iPhone or iPad, as the iOS17 Photos app supports HDR AVIF when viewed full screen (and does not support JPG gain maps, so it would show those in SDR).
- Due to some apparent bugs in iOS17.0’s initial support, exporting in the Rec2020 colorspace appears to be the safest option (the others may show mangled thumbnails and the full-sized sRGB may look incorrect).
- These do not support gain maps currently, so this is not ideal for sharing in a web browser if the viewer may have an SDR display (which would result in automatic tone mapping) or does not support AVIF (MS Edge does not at this time).
You may also export HDR as JXL or 32-bit TIF (on LR Classic), which may be helpful formats for sharing an editable image, but probably not something you’ll use at this time.
On mobile, choosing “save copy to device” will export an HDR source as a JPG gain map. Using “export as” will give you options, including AVIF.
Sharing your HDR portfolio online right from Lightroom:
You can also share image directly through shared albums in Lightroom following these steps:
- Use the cloud version of LR desktop, a mobile version, or lightroom.adobe.com
- In “share and invite“, set link access to “anyone can view“.
- Click the clipboard icon to copy the sharable URL.
- See Adobe support (or this post) for more details.
Here’s my example gallery. The grid view is unfortunately not HDR at this time, but you’ll see HDR when you click an image to view it large. When you click to show full size, it will show an HDR AVIF if supported, or otherwise will show an SDR JPG (so this not a gain map, but something more sophisticated which is functionally the same and offers faster / smaller downloads).
HDR limitations in LR:
Initial support for HDR includes editing in the Develop module, filtering for HDR images in the Library, and exporting HDR images (including HDR JPG gain maps or HDR images as AVIF or JXL). You cannot print HDR (because you would need glowing ink to do that), but the print module will offer to tone map to SDR for you to print.
At this point, there are some gaps in HDR coverage:
- The Library module only shows HDR clipped to SDR. They will show as clipped to SDR, which is still very useful for basic image management (renaming, moving, adding keywords, selecting images for export, etc). The “compare” tool would be particularly useful to have HDR support, as it is very helpful for making editing decisions.
- The “merge to HDR” preview is shown in SDR. This has no effect on the results and is not a concern at all.
- The Map module only shows HDR clipped to SDR. Not many people use this, but you can still effectively manage location data with the clipped SDR view.
- The Slideshow Module only shows HDR clipped to SDR. This makes it useless for HDR at this time, but you can easily use one of these workarounds:
- Make the Develop module show a full screen image (<shift>-Tab to hide panels and <L> twice to dim the edges (“lights out” mode). Then use the arrow keys to advance through your selected images. Note: do not use <F> for full screen, as that clips to SDR.
- Export HDR AVIF images to an iPhone, iPad, or Android to show a slideshow there.
Aside from missing modules, there are some aspects of HDR which work differently you should be aware of:
- Curves work quite differently. Do not copy them from SDR to HDR images or vice versa, they will almost always need revision. If you have a curve edit and toggle HDR mode, it may cause some confusing changes in the image if you don’t understand this impact.
- Most other edits are pretty safe and seamless, but there can be some differences and you should review the image when turning HDR mode on or off if there are other edits in the image.
Conclusions:
First, I would just like to acknowledge and thank the ACR and LR teams for their support for HDR. They’ve created an extremely simple and intuitive interface for an extremely complex topic. Their work is an incredible achievement.
HDR is no longer some distant future utopia, you can use it now to show significantly better images on a wide range of displays. With these LR updates and other recent updates across the HDR ecosystem, you can now edit and view HDR on a wide range of devices including Mac, PC, iPhone, iPad, and Android. And you can share those HDR images to view on the web with most of those devices and web browsers.
HDR is new and there are still some gaps of course, but they are no longer a reason to wait to use HDR. When you share your work as a gain map, your image will safely fall back to a beautiful SDR image anywhere HDR display is not supported. Your worst-case scenario is sharing the same image you would have before, and a large number of viewers will see a significantly enhanced HDR image. Support for HDR has been expanding rapidly over the past year and things are only going to get even better from here.
As always, there are other updates with the latest major LR release. Notable enhancements include: Point Color in the Color Mixer allows you to target and revise color in the image, the ability to work with a local image in LR mobile without syncing to the cloud,
HDR photography resources:
For more information on HDR, please see my related posts on:
- HDR tests and general resources (key page)
- Recommended monitors for HDR
- HDR editing with ACR
- HDR editing with Lumenzia (luminosity masks) in 32-bit Photoshop
- Upgrading SDR images to HDR
- How “gain maps” work and how to create them to share your images
- HDR gain map gallery
Adobe links:
- HDR Explained from Eric Chan and the ACR team
- HDR edit and export
- Other new features in LR

